DIY: Fresh Floral Crown
As you probably know by now, I've been working hard (with the help of a few truly fabulous friends) on a little editorial styling. I'm broadening my creative horizons and taking on a new path with gusto! The first in a series of shoots I'm working on (alongside my main girl, Ginny from Sleepy Fox Photography) inspired me to also work on a little floral styling. I got it into my head that our model just had to have a chunky flower crown and creating this kind of headpiece has driven me to fall madly in love with working with all kinds of blooms.
Because we should all be able to rock a gorgeous floral crown this Summer, I'm sharing my process today... HOORAY!
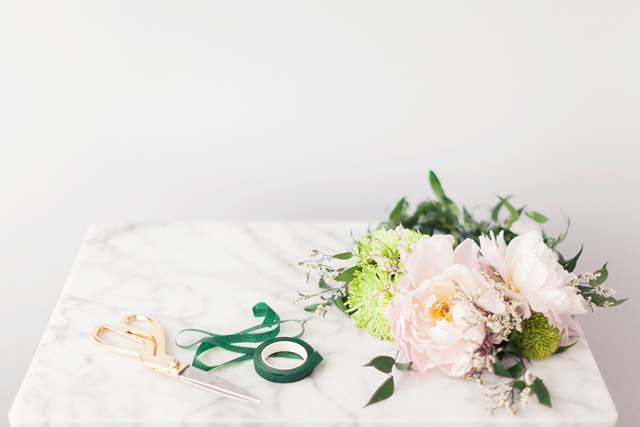
Lo & I took a trip to the flower market early in the morning on shoot day and collected our materials. I had a vision for the headpiece but didn't have any particular blooms in mind so I let the market guide me and went with whatever looked great in the moment (which is the fun part of working with flowers!). Here's what you'll need:
olive branches (1-2 for each crown)
a variety of blooms
filler (ex: baby's breath)
green floral tape
floral wire
scissors
wire cutters
step one: prep your blooms - Gather your flowers. Strip the leaves from each stem (discarding most but saving a few for filling in gaps later on).
step two: create your base - Using an olive branch, measure the crown of your head. Don't forget to leave a little slack so it's not too tight. Using the green floral tape, secure the branch into a halo (tip: floral tape only sticks when wrapped onto itself... be sure to pull the tape taught as you wrap).
note: since our crown had a lot of heavy blooms, I doubled the branches for stability
step three: prep your blooms... again - Take your floral wire and carefully poke it through the center of each flower so there is wire sticking out the top and bottom. Taking the wire on top, create a tiny "hook" at the end and pull the remainder through the bottom. At this point you shouldn't be able to see wire on top of the bloom and your hook will act as an anchor so the wire doesn't slip through. Wrap the wire around the stem a few times and, using your scissors, snip off most of the stem's length. You should be left with a bloom suspended on wire.
repeat this step for each bloom you plan on attaching
step four: adorn your crown - With the prepped blooms ready to go, decide on the placement of your flowers. Begin attaching each one by wrapping the remaining floral wire tightly around your head-wreath (you can also add a little floral tape if your bloom is particularly heavy like these peonies).
note: you can stop here if you like a sleeker & more dainty crown... these look awesome without filler too!
step five: filler - Using smaller flowering branches (I used baby's breath) and a few leftover leaves, randomly fill the gaps in your crown/between the already placed blooms. I didn't have to tape or wire these since they're so light... simply poke them through your branches and weave the longest parts through to blend into the wreath.
remember: There's no right way to make a flower crown! Place your blooms and adornments as you see fit. Each crown should look organic/effortless and totally unique.
photos by sleepy fox photography
fashion, floral and prop styling by chelsea & the city
sources:
modern chair, gold shears


